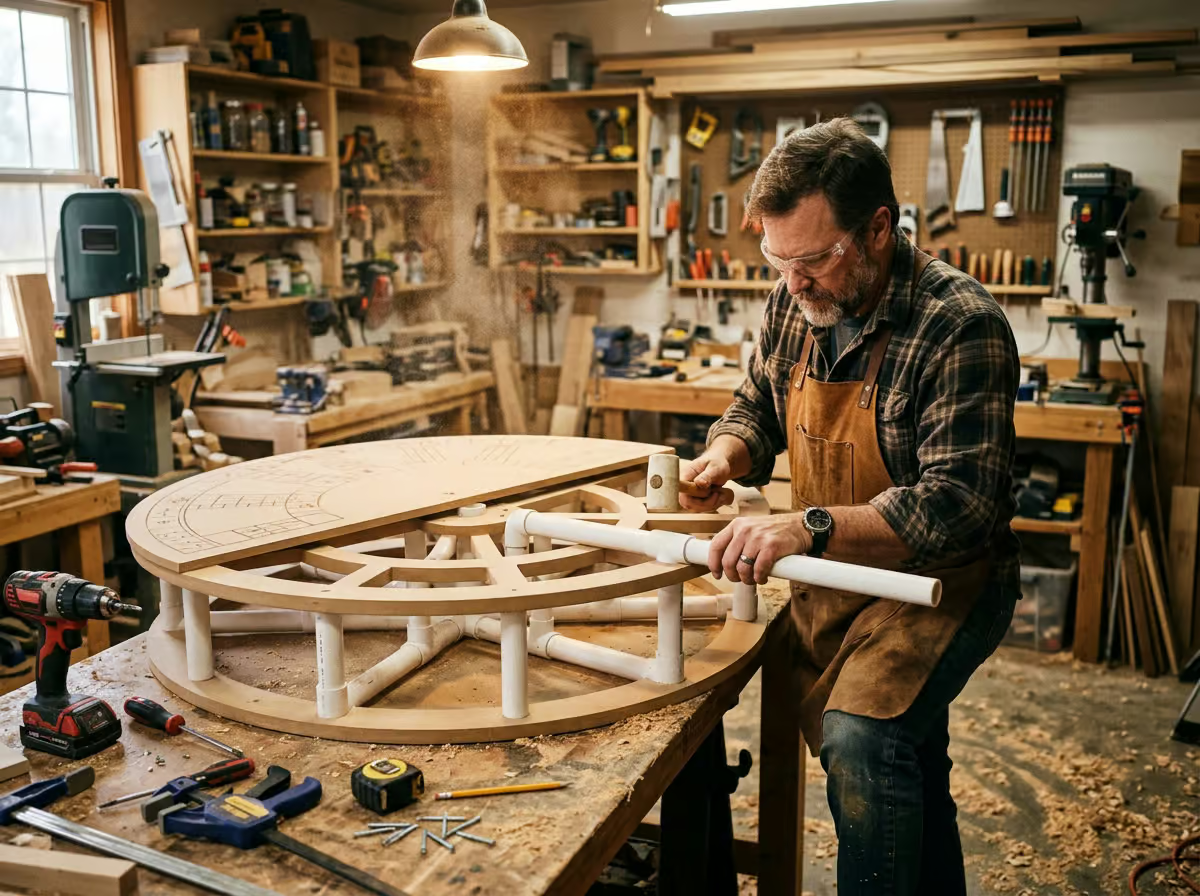
Most “hobbies for men” lists treat making things as one line item between golf and grilling. That’s a miss, because woodworking, leathercraft, and metalwork attract one shared identity: guys who want to build tangible things with their hands, in wood, leather, or metal. This guide covers that corner, and it covers it with numbers, because the usual listicles never do. The four stalls that stop most guys are the same four every time: hidden costs beyond the sticker price, no garage to work in, buying the wrong starter kit, and the question of whether the gear investment can ever be earned back.
So here’s the deal up front. Leathercraft and woodworking get the full quantified treatment: kit prices, shop-setup totals, time to your first finished piece, and one documented case of a hobby paying for itself. Metalwork and repair get named honestly as the places where the numbers get thin. If you want the wider map first, our guide to hobbies for men in their 20s covers the full spread.
Key Takeaways
A leathercraft start runs about $54 to $80 for a kit (Bagerla 273-piece or Simpzia 52-piece), but budget separately for a stitching pony, the one essential tool both kits leave out.
A beginner woodworking shop costs under $1,000, with a couple hundred dollars as the workable minimum, and a first Weekend Woodworker project is doable in two days.
One Etsy seller made $115,000 selling triangle mountain decor cut from $5 boards, but competitors copied the design exactly and demand held anyway.
Table of Contents
Leathercraft is a genuinely good beginner hobby: the tool set is small, it fits on a table, and your first project is done in a couple of hours. It also does something for your head, and it’s worth saying how. Cutting, stitching, burnishing, and finishing each demand enough focus that the day’s noise drops out. You notice it an hour in: you’re less wound up than when you sat down. No program, no practice, just a bench and a task.
The creative range is real, too. Wallets, belts, journal covers, bags, and the textures, colors, and styles are actual choices you make, not decoration. The payoff is physical: a stitched wallet or a tooled keychain lasts years, and the belt you wear every day is a better trophy than anything on a shelf. There’s a quick history beat here worth one amused line: this was a survival skill for most of human history, and now it’s a weekend hobby. Fine by me.
And for the no-garage crowd: a table is enough. That’s the whole space requirement.
Best leather working kit for beginners under $100
The best leather working kit under $100 depends on how committed you are. If you want everything upfront, the Bagerla 273-piece kit is the pick. If you’re not sure you’ll stick with it, the Simpzia 52-piece kit gets you started for less. That’s the whole fork in the road, and both kits are on Amazon.
Bagerla Leather Crafting Tool Kit (273 pieces)
This is the everything-in-one-box option. The real contents: a hammer, needles, an awl, a groover, scissors, knives, pliers, rivets in four colors, a cutting mat, a ruler, and stamps with letters, numbers, and shapes. Yes, butterflies and flowers are in the stamp set. Some guys will skip those, some won’t care, and it’s honest to say so.
Say 273 plainly, but know that piece count is partly padding. The useful core is what matters, and the useful core here covers a first year of projects. One more practical point: it all ships in a durable storage box, which means your gear has a home instead of ending up scattered loose in a drawer. Minor detail, genuinely useful.
On price, treat these as reported numbers rather than a live check, since Amazon pricing moves around: the kit has listed at $79.99 with a 10% off coupon, which worked out to roughly $54 for Prime members.
Simpzia Leather Tool Kit (52 pieces)
The smaller option: knife, groover, stitching wheels, needles, chisels, and a 20-shape stamp set. That’s enough to actually start without overwhelming a first-timer. What’s missing, said straight: rivets and alphabet or number stamps. If personalizing your work matters to you, this kit falls short. If you just want to find out whether you like sitting at a bench for two hours, it’s the right call.
The stitching pony: the hidden first purchase
Here’s the failure pattern that catches a lot of first-timers. Guy buys the all-in-one kit, sits down to sew a wallet, and discovers the one tool that holds the leather steady while sewing isn’t in the box. That tool is the stitching pony. It’s essential for any sewing project: it clamps the leather so both sides stay accessible mid-stitch, and it improves stitch control for right- and left-handed users.
Neither kit includes one. Budget for it separately and you’ve dodged the most common first-project stall.
Red flag: Neither starter kit includes a stitching pony, so add one to the cart before your first wallet project or you’ll stall mid-sew.
The flip side is overbuying. A separate mallet is unnecessary when the kit includes a Maul, which most do, so check before you buy. A rotary punch is skippable if your hardware ships with its own setting tools. One less thing in the cart.
Last thing, and it lowers the real cost of starting: well-kept leathercraft tools hold resale value if the hobby doesn’t stick. Good tools don’t become landfill.
Leather crafting tools you need at home
Starting leather crafting at home takes a short core tool list, a cheap safety kit, and a few specific technique choices. Here’s what you actually need before you buy anything fancy:
- Hammer
- Scissors
- Pliers
- Knife or cutter
- Chisel
- Groover
- Awl
- Edge burnisher
- Needles
The embellishing tier, rubber hammer, punches, rivet setters, stamping tools, is the later, once-you’re-hooked stuff. Two tools deserve a plain explanation. The edge burnisher smooths edges so they don’t fray, and it’s the tool nobody knows they need until their first wallet starts unraveling. The edge beveler rounds edges on heavier leather, cut at 45 degrees.
Safety gear before the first cut
The boring stuff that keeps you working: a towel, rubber or nitrile gloves, a cheap face mask for sanding dust, safety glasses around machinery, a first aid kit, and alcohol prep pads for pricked fingers. A respirator for fumes, used only in well-ventilated areas. None of it is exciting. All of it is cheap.
Patterns, cutting, and gluing
Start patterns on 110 lb paper, not lighter. Lighter paper tears or shifts when you trace, and a shifted pattern is a wasted piece of leather. A scratch awl handles marking, and a wing divider draws parallel stitch lines and measures, it’s the tool that makes your stitching look straight instead of hopeful. For cutting: a box cutter or craft blade with an 18-inch corkback ruler, on a self-healing mat that protects the table and the blade.
For glue, contact cement is what actually holds, and Eco Weld is the water-based pick: less stink, same bond. The whole trick is two beats: apply glue to both sides, then press them together firmly for a strong bond. Spread it with an applicator, a cheap paintbrush, or an offcut of leather you already own. And the quiet long-game benefit of patterns: once you have one, you can remake the item later with better leather or better skills.
Stitching and edge work specifications
Stitching chisels and pricking irons are technically different tools, and every beginner hits the naming confusion. In practice they’re used interchangeably, so don’t lose sleep over which label is on the listing. Recommended spacing is 3.85 mm, the common choice because it covers real work. Buy at least a 6- or 10-prong plus a 2-prong; a 1-prong is optional.
Harness needles have blunted tips, so they push through existing holes instead of stabbing you. That matters at hour two. Thread: polyester, nylon, or linen. Cotton breaks down from the tannins and oils in leather, which is the trap.
Got unwaxed thread? Run it across beeswax, thirty seconds of prep that saves an hour of frustration. A lighter melts thread ends into a plug so knots don’t slip, the difference between held together and fell apart in a week.
Edge work is often aesthetic rather than necessary, and some guys skip it and are fine. If you do it: bevel at 45 degrees, sand at 300 to 500 grit (thousands if you want a mirror polish), smooth it with a slicker and Tokonole, then a final buff with canvas. For punching, a beading mallet with a plastic head is gentle on your tools, and a poundboard absorbs the shock. Layered scrap leather works as a substitute, and it saves your bench, your blades, and your patience.
Choosing beginner leather: oil tan vs veg tan
Oil tan is the honest first leather: it comes pre-colored and resists stains, which is exactly what a first project needs. Veg tan is the iconic tooling leather everyone pictures when they think of leatherwork, but it darkens over time and forces you into dyeing before you’ve learned to cut straight. The classic beginner leather is the wrong first buy.
You’ve got three beginner-friendly options: natural veg tan, oil tan, and thickened chrome tan, with oil tan at the top. Chrome tan is supple, almost fabric-like, and the backed or rigid version behaves more like oil tan if you want that. Pigskin earns one line: thin wallet card pockets, and that’s it. The darkening thing isn’t hypothetical. There’s a classic example of a belt that started as light natural veg tan and darkened over months of wear, which some guys like and some don’t, but a beginner should get to choose.
One weird unit to translate: thickness is measured in millimeters but sold as ounces. When a listing says 4 to 5 ounce leather, that’s the thickness.
Leathers to skip as a beginner
Bison, buffalo, and stingray pelt are demanding to work, and sourcing them needs ethical and legal verification. Nice to admire, but a poor first purchase. Faux leather handles differently than the real thing, so don’t expect your skills to transfer one-to-one. And the four labels you’ll see everywhere: full-grain, top grain, split, bonded.
Full-grain is the top layer untouched, top grain is sanded down a step, split is the lower layer, bonded is scraps pressed together. That’s the decoder, no lecture needed.
Leather sourcing: scrap, panels, Twitch auctions
Start with scrap, sometimes free from tanneries, or 1 to 2 square foot panels. Thrift store finds work too. Never a full hide on day one how to get started in leather work is really about working small before scaling up. Amazon veg tan panels run roughly 4.5 to 5 oz, from 6×12 inches up to 2 sq ft.
Thrifted handbags yield D-rings, zippers, and magnetic closures, and taking one apart teaches you how bags go together. Reed hides are thin, durable, multi-color, and easy; Springfield leather is thicker, higher quality, still affordable. Retailer tradeoffs, compressed: Tandy carries everything and runs frequent sales, Weaver runs slightly pricier, Springfield streams weekly on Twitch with Thursday leather auctions (guys have picked up their first full-size hides cheap there after starting with an Amazon kit), Buckle Guy is the hardware source, and leatherworker.net’s secondhand forum sales turn up used splitters, clicker presses, and cutting dies.
Michael’s is convenient but expensive for quality leather. And a sale like leather4craft.co.uk’s Back to the Workshop Sale, reported at 25% off select leather, is when you buy, not when you pay full price.
First leathercraft projects: tray, wallet, belt
The valet tray, wallet, and belt sequence is a skill ladder disguised as a shopping list: the tray teaches riveting, the wallet teaches stitching (and exposes the missing stitching pony), the belt teaches edge work. Each takes a couple of hours. The belt is possibly the most rewarding, because you wear it almost every day. Supply lists, compressed: the tray needs scrap leather, copper rivets and burrs, a ruler, knife, hole punch, and pen or awl (instructions from Apartment Therapy).
The wallet adds a rotary cutter, groover, edge beveler, needles, waxed thread, stitching pony, and wax pencil (The Mr. Lentz Shop). The belt adds a buckle, strap cutter, and skiver. For hardware personality: Buffalo nickel snap buttons, Chicago screws for swappable buckles, spring clips as money clips.
Woodworking for beginners: what it really takes
Beginners can get started with far less gear than they expect. The I need a full shop before I make anything myth kills more starts than any tool ever will, so kill it early.
Personality fit, honestly: nothing about this is physically demanding, you work at your own pace, and it suits problem-solvers and introverts. The real draw for office workers is simple. All week you push pixels. On the weekend, you make something you can touch.
On whether it’s the hottest craft right now: the supported evidence is demographic growth, not a popularity ranking. Women and Millennial office workers in their 20s and 30s have been picking it up, driven by online communities and cheaper tools. That’s who’s joining, and it isn’t who most people picture, very different from, say, the outdoorsman sub-world of hiking and bushcraft. If you want the broader screen-free picture, our offline hobbies guide maps the whole territory.
Quick decoder, few lines, then we move on. A woodworker builds things from wood as a craft or hobby. A carpenter builds structures, houses, framing, trim. A cabinet maker specializes in fine furniture and cabinetry. A maker is the umbrella term for anyone who builds stuff, digital or physical.
What a beginner woodworking shop costs
A beginner woodworking shop costs under $1,000 for a full setup, with a couple hundred dollars as the workable minimum. The typical starting assumption is that a full shop is needed before making anything. The counter is specific: under $1,000 for the whole setup, or a couple hundred at the floor, and a first Weekend Woodworker project done in two days. That’s a budget line, not a barrier, roughly what some guys spend on a phone case collection.
What makes the number work is buying used: Harbor Freight, Walmart, and Facebook Marketplace. Two free resources point the way: the sub-$1,000 shop guide at mytoollist.com, and the 7-essential-power-tools list, which is a shopping shortlist, not a mandate. Take the list, buy used, make something in a weekend.
Woodworking tool paths: hand, power, digital
Yes, power tools carry real injury risk, and that’s the actual price of the path roughly 90% of woodworkers take. A presenter with more than 40 years in the craft puts the split at about 90/10 toward power, and that path demands learning the safety side. Not scary, just real.
The quantified tradeoff, no moralizing: hand tools cost less upfront but more in learning time, and a $200 hand plane isn’t unusual for a committed hand-tool guy. They’re quieter, slower, and deeply satisfying. Power tools give fast results, a shallow learning curve, and real risk. Most guys actually land on the blend: power tools for most cuts, hand tools for demanding joints like dovetails.
CNC and laser machines
CNC machines make precision computer-controlled cuts on flat stock, and laser cutters cut even finer, producing art that’s genuinely impressive. But they cost thousands of dollars and they don’t replace a table saw. Worth knowing before the receipt makes the point for you. Some guys also feel digital tools cut into the handmade satisfaction. That’s a fair opinion, not a verdict.
Wood turning and scroll saw
A lathe holds and rotates the workpiece while you turn bowls and spindles, a bit like sculpting clay, though lathes can be expensive. Scroll saws cut tiny curves and intricate patterns, take practice, and are relaxing. They’re also cheap, quiet, and low-mess, the rare hobby tool that won’t annoy the household, which makes this the apartment-relevant corner of woodworking.
Selling woodworking projects on Etsy
Yes, you can make money selling woodworking projects on Etsy. One documented seller, the JASCOgoods creator, earned $115,000, and the immediate caveat is that this is one guy’s result, not a promise or a typical income. But the case is worth studying because the work was so unglamorous.
The product: 1×4 boards, less than $5 each, cut into 3.5-inch triangles at a 31.6-degree angle, stained, taped, and painted with white peaks. Sold in $18 sets of three. Materials ran 30 to 50 cents per piece, shipping $2 to $3 per set in bubble envelopes, first sale within a few days of listing, cell phone photos were enough. He started with an old Ryobi saw and hand sanding; profits bought a miter saw, a belt sander, and a pickup truck.
The research method: search “wood decor” on Etsy, study the best sellers without copying exactly, and check review counts and views as demand signals. Personalized items are believed the best-selling category, because Walmart and Amazon can’t do custom. Mountains sold year-round; Christmas trees sold only seasonally.
The counterintuitive finding on saturation: competitors copied the mountains exactly, down to the stacked set-of-three main photo, yet the copied listings still showed 20-plus views in 24 hours (the counter caps at 20). Demand survives copying, and the margin goes to quality details like sanding the grain so it pops, vinyl for clean lines and batch production, and personalization. Watch for pricing games: some competitors displayed $5 that was really $16 plus $4.55 shipping, with other sets at $25, $28, and $42.29 to $42.49. Judge by the full checkout total, not the thumbnail figure.
The failures make the wins believable: listings that led with colored thumbnails went nowhere, and a coffee cup listing sold zero. A separate digital seller’s receipts back the demand claim from another angle, roughly $18,000 total from mountain listings, including $10,789 from mini mountains, $3,000 from larger ones, $11,000 from trees, and $2,634 from individually sized pieces. That copycat pattern shows up across Etsy craft niches, illustrated here, not ruled by it.
Buyer rule: Check the real listing total, not the thumbnail price, before judging what a competitor actually charges.
Metalwork, knife making, and repair hobbies
DIY is a hobby when the finished object is the point. Restore-and-repair work is creative leisure with something to show at the end, which is a different thing from home-maintenance chores. Fixing a dripping faucet because you have to is a chore. Restoring a hand plane because you want to is a hobby.
Metalwork, knife making, and repair/restore are the natural next rungs on the workshop ladder, and the hands-on appeal transfers directly from leather and wood. Here’s the honest asymmetry, stated plainly: you got exact dollar figures for leathercraft and woodworking above. Entry costs for metalwork and repair are higher and less documented, and this article says so rather than inventing numbers. If you go that direction, expect to do your own pricing homework.
What does transfer across crafts: quality tools hold resale value if you quit, and secondhand channels work beyond leather and wood. The forums-and-marketplaces model you saw at leatherworker.net has equivalents in every tool community.
Choosing your first workshop hobby
Leathercraft is cheaper and easier to start; woodworking scales further. The right pick depends on which tradeoff matters most to you. Here’s the decision matrix built from this article’s own numbers:
| Leathercraft | Woodworking | |
|---|---|---|
| Entry cost | ~$54-80 starter kit | Couple hundred to $1,000 |
| Time to first finished item | A couple of hours | Two days |
| Hidden purchases | Yes (stitching pony) | Partial (used-market hunting takes time) |
| Space | Yes (a table) | Partial (a corner of a shop) |
| Resale value if you quit the hobby | Yes (if tools are well kept) | Yes (if tools are well kept) |
And the same comparison as a straight list, if that reads easier:
- Cheaper to start: leathercraft, at roughly $54 to $80 versus a couple hundred dollar minimum for woodworking.
- Faster first win: leathercraft, a couple of hours versus two days.
- Room to scale: woodworking, from weekend projects to furniture to a side income.
- Apartment-friendly: leathercraft on a table; woodworking’s quietest option is a scroll saw, and some guys work on an apartment roof.
On personality: introverts and problem-solvers tend to suit woodworking. Small spaces and apartment tables suit leathercraft. One purchasing fact worth knowing either way: ergonomic padded mallet handles, automatic burnishing and sanding machines, and pre-punched or pre-cut kits mean arthritis or limited grip changes which tools to buy first, not whether the hobby is possible.
So the recommendation, supported by everything above: pick by the tradeoff that matters most to you. Cost and space point to leathercraft. Scale and problem-solving point to woodworking. Exit liquidity is decent in both if you keep your tools nice. And on metalwork, the entry-cost data gap stands: the numbers aren’t documented well enough to put in a table, and you deserve that said plainly instead of a guess.
Frequently Asked Questions
What are the 10 best hobbies for men?
The best lists group hobbies by identity rather than dumping golf, grilling, and chess into one pile. For guys who want to build tangible things with their hands, the core three are leathercraft, woodworking, and metalwork, with restore-and-repair work as a natural fourth rung. Leathercraft and woodworking are the easiest to quantify: a leathercraft start runs roughly $54 to $80, and a beginner woodworking shop comes in under $1,000.
What are good craft hobbies?
Leathercraft is one of the best entry points: the tool set is small, it fits on a table, and your first project — a valet tray, wallet, or belt — is done in a couple of hours. Woodworking is the other standout, scaling from weekend projects up to furniture and even side income. Both reward problem-solvers, and quality tools in either craft hold resale value if the hobby doesn’t stick.
What are the 10 best hobbies for men who like working with their hands?
For hands-on guys, the workshop corner is the answer: leathercraft, woodworking, metalwork, knife making, and restore-and-repair work all share the same appeal — building something tangible. Leathercraft is the cheapest and fastest start at roughly $54 to $80 with a first piece in a couple of hours; woodworking costs a couple hundred dollars minimum but scales from weekend projects to furniture to a side income.
What are good craft hobbies for men to start at home?
Leathercraft tops the list for home starts because a table is the entire space requirement — no garage needed. Woodworking works at home too, especially with a scroll saw, which is cheap, quiet, and low-mess enough not to annoy the household. Both need only a modest safety kit: gloves, safety glasses, a dust mask, and a first aid kit.
Is leather working a good hobby for beginners and how do I start?
It’s genuinely one of the best beginner hobbies: the tool set is small, it fits on a table, and your first project takes a couple of hours. Start with a kit like the Bagerla 273-piece (around $54–80 with coupon) or the smaller Simpzia 52-piece, then budget separately for a stitching pony — the one essential tool neither kit includes. Pick oil tan leather for your first project; it comes pre-colored and resists stains, unlike veg tan, which darkens and forces you into dyeing before you’ve learned to cut straight.
Is woodworking dangerous for beginners with power tools?
Yes, power tools carry real injury risk, and that’s the actual price of the path roughly 90% of woodworkers take, per a presenter with more than 40 years in the craft. It’s not scary, just real: that path demands learning the safety side. Hand tools are the quieter, slower alternative, and most woodworkers land on a blend — power for most cuts, hand tools for demanding joints like dovetails.